Soups & Stews
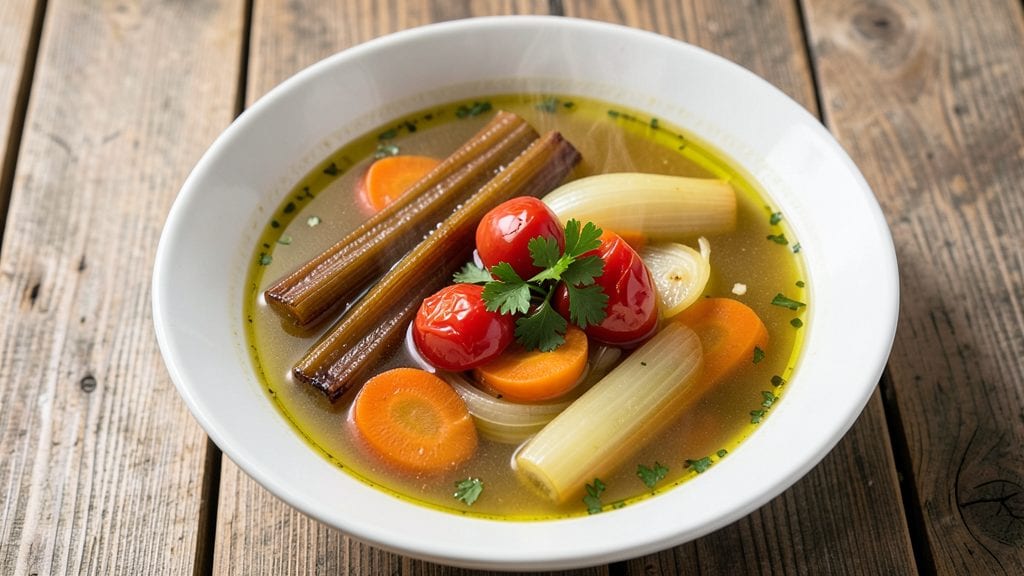
A basic soup recipe built from pantry staples proves that comfort food doesn't require fancy ingredients or complicated techniques. This one-pot method transforms simple vegetables, broth, and aromatics into a deeply satisfying meal that warms both body and soul.
I developed it during a particularly chilly winter when I needed something nourishing that came together in under an hour without dirtying a dozen dishes.
The beauty of this recipe lies in its adaptability—swap vegetables based on what you have, use store-bought or homemade broth, and adjust seasonings to your taste. The key technique is proper simmering, which develops rich flavors without overcooking the vegetables.
With just a few essential components and basic cooking methods, you'll achieve restaurant-quality results that taste even better the next day.
By the time you finish, you'll have a fragrant, hearty soup with tender vegetables swimming in a flavorful broth that's perfect for any meal. The simplicity of this recipe makes it ideal for weeknights, meal prep, or feeding a crowd.
Whether you're a beginner or seasoned home cook, this method delivers foolproof comfort every time.
Serve it as-is or with optional garnishes like fresh herbs, a drizzle of olive oil, or a sprinkle of cheese. The possibilities are endless, but the foundation remains the same—simple, satisfying, and always delicious. Let's get started with this versatile one-pot creation.
Ingredients for basic soup
Pantry staples plus a few fresh aromatics—this soup comes together faster than you can boil water.
| Ingredient | Amount | Notes |
|---|---|---|
| Vegetable Broth 💧 | 4 cups | Low-sodium preferred for control |
| Carrots 🥕 | 2 medium | Peeled, chopped into chunks |
| Celery Stalks 🧅 | 2 whole | Diced into small pieces |
| Yellow Onion 🧅 | 1 whole | Chopped into small dice |
| Garlic Cloves 🧄 | 3 cloves | Minced for aromatic base |
| Canned Diced Tomatoes 🍅 | 1 can | 14.5 oz can, drained |
| Potatoes 🥔 | 2 medium | Russet, peeled, cubed |
| Olive Oil 🫒 | 1 tbsp | Extra-virgin for richness |
| Salt 🧂 | 1 tsp | Diamond Crystal preferred |
| Black Pepper 🌶️ | ½ tsp | Freshly ground preferred |
| Dried Thyme 🌿 | ½ tsp | Or 1 tsp fresh thyme leaves |
| Bay Leaf 🍃 | 1 whole | Remove before serving |
| Fresh Parsley 🌿 | ¼ cup | Chopped, for garnish |
The broth is your flavor foundation. Store-bought low-sodium works in a pinch, but homemade—even from bouillon cubes—takes this to the next level. I always grab the Swanson Organic Vegetable Broth from the grocery store's natural section when I'm short on time, but nothing beats simmering your own. The carrots and celery should be roughly the same size so they cook evenly—no need to peel them if you're using organic. For the potatoes, Russets hold their shape better than Yukon Golds in this application, but use what you've got. The garlic? Freshly minced makes all the difference here—jarred garlic just doesn't cut it.
No fresh thyme? Dried works at half the amount, but the flavor profile shifts slightly. Running low on tomatoes? Tomato paste at 2 tbsp gives you concentrated flavor without adding liquid. The bay leaf is non-negotiable—it adds that subtle earthiness that takes soup from good to great. Trader Joe's has the best pre-chopped celery and carrots if you're in a hurry, but they're more expensive than whole stalks. For the olive oil, any good quality works—you're not making a vinaigrette here, so don't stress about the fancy stuff. The parsley is just for garnish, but it makes the soup look restaurant-worthy when you serve it.
This soup actually tastes better the next day—the flavors meld beautifully overnight. Keeps 4-5 days in the fridge, and freezes for up to 3 months if you portion it into containers. I always make a double batch because it's perfect for meal prep. The broth reduces slightly when reheated, so add a splash of water if it gets too thick. For serving, I like to drizzle with a little extra olive oil and a crack of black pepper—simple but effective.
Why You'll Love This Recipe
- Pantry Rescue: I swear by this when my fridge is bare. Just broth, onions, carrots, and celery—no fancy ingredients, no last-minute grocery runs. The celery adds that subtle crunch, and the onions caramelize just enough to give it depth without effort.
- Garlic Magic: That first whiff of garlic simmering in the broth? Instant mood booster. I don’t even measure it—I just toss in 3-4 cloves, let them bloom in the oil, and suddenly, this soup tastes like it’s been simmering for hours. (Between us, it’s my secret weapon for lazy nights.)
- Leftovers That Beg: This soup tastes better the next day. Honestly, I make a big batch on Sundays, and by Wednesday, it’s the only thing anyone wants. The flavors meld, the veggies soften just right, and it’s still light enough for lunch or hearty enough for dinner.
- Budget Blanket: For under $5, I feed four people a meal that feels special. The carrots and celery stretch the broth, the onion adds layers without cost, and the garlic? Pure flavor for pennies. It’s the kind of recipe that makes me feel like I’m cooking like a pro, even when I’m not.
Step-by-step instructions for one-pot comfort soup
Here's how to build a deeply flavorful soup using only your pantry staples.
Sauté the Aromatic Vegetable Base
Heat the 1 tablespoon olive oil in a large Dutch oven or heavy pot over medium heat until shimmering. Add the chopped yellow onion and cook for 3-4 minutes until softened and translucent, stirring occasionally. This foundational step develops sweetness in the onion.
Add the diced celery stalks and chopped carrots, stirring to combine. Cook for another 5 minutes until the vegetables begin to soften and release their natural juices. You'll notice the mixture becomes more fragrant as the vegetables break down - this is when the real flavor development begins.
Stir in the 3 cloves minced garlic cloves and cook for 30 seconds until fragrant but not browned. Garlic burns quickly, so keep an eye on it. The moment you smell that aromatic punch, you know it's ready for the next step.
Build Flavor with Tomatoes and Herbs
Pour in the 1 can drained canned diced tomatoes and stir to combine with the vegetables. Add the 0.5 teaspoon dried thyme, 1 whole bay leaf, and 1 teaspoon salt. Cook this mixture for 5 minutes over medium heat, stirring occasionally, until the tomatoes begin to break down and release their juices.
This step creates the flavor foundation of your soup. The tomatoes add acidity that balances the richness of the broth, while the thyme and bay leaf infuse deep herbal notes. You'll see the mixture darken slightly as the tomatoes caramelize - this is when the true depth of flavor emerges.
Add the cubed 2 medium potatoes and stir to coat evenly with the tomato mixture. The potatoes will absorb some of the liquid, helping to thicken the base slightly as they cook. This is particularly important for creating that satisfying body in your final soup.
Simmer Until Vegetables Are Tender
Pour in the 4 cups vegetable broth, stirring to combine all ingredients. Bring the mixture to a gentle boil over medium-high heat, then immediately reduce heat to low and cover partially. Let the soup simmer for 20-25 minutes until the potatoes are fork-tender and all vegetables are easily pierced with a knife.
The key here is patience. You want the vegetables to soften completely but not disintegrate. Check occasionally and taste the broth - it should be developing that rich, complex flavor. If the soup reduces too much and becomes too thick, you can add a splash of water or more broth to reach your desired consistency.
About 5 minutes before the soup is fully cooked, add the 0.5 teaspoon black pepper. This timing ensures the pepper is fully incorporated into the flavor profile without overpowering the other ingredients. The pepper will distribute evenly throughout the soup as it finishes cooking.
Finish and Garnish for Freshness
Remove the 1 whole bay leaf from the soup and discard it. Stir in the 0.25 cup chopped fresh parsley and cook for an additional 2 minutes to allow the parsley to release its bright, fresh flavor. The parsley not only adds visual appeal but also provides a fresh contrast to the rich, savory broth.
Taste the soup and adjust seasoning if needed. You might find you need a touch more salt to balance the flavors, especially if you're using low-sodium vegetable broth. The soup should be well-seasoned with a harmonious blend of sweet, savory, and slightly acidic notes.
Let the soup sit off the heat for 5 minutes before serving. This resting period allows the flavors to meld together completely. The soup will continue to develop in flavor as it sits, becoming even more delicious with each passing minute.
Pro Tips For Making Basic Soup
- SWEEP THE POT FIRST: Scrape the bottom of your pot with a wooden spoon after browning the onion—this collects all the stuck-on bits that actually deepen flavor. I used to skip it, and my soup always tasted flat until I realized I was missing half the taste.
- CHOP ONIONS SMALLER THAN YOU THINK: Tiny dice (⅛-inch pieces) release flavor faster than big chunks, and they’ll melt into the broth instead of sitting as chewy bits. Yes, it takes 2 minutes longer to chop, but your soup will taste like it simmered for hours.
- DON’T BOIL IT: Keep the broth at a gentle simmer—hard boiling turns carrots and celery mushy and makes the broth cloudy. A steady, barely-bubbling surface keeps everything tender and clear. (I know, it’s tempting to crank the heat.)
- SAUTE GARLIC LAST, LOW AND SLOW: Toss in the garlic after the onion’s softened, then reduce heat to medium-low and cook just until fragrant—about 30 seconds. Burning it adds bitterness, and raw garlic just sits like a flavorless rock. (Trust me, I’ve made this mistake.)
Common mistakes when making perfect results
Overcooking Vegetables
One of the most common mistakes is letting vegetables simmer too long, turning them mushy and watery. I've ruined many batches by forgetting to check for doneness at 20 minutes—the potatoes should be tender but still hold their shape.
Use a fork to test: if it slides in easily but the potato resists, it's perfect. For extra insurance, add potatoes 5 minutes after celery and carrots to ensure even cooking. 🥔
Skipping the Sauté
Many people pour broth directly into the pot without first sautéing the onions, celery, and carrots. This step develops deep, sweet flavors through the Maillard reaction. I always take the extra 10 minutes to cook these aromatics until soft and fragrant—it makes all the difference.
If you're in a hurry, use 1 tablespoon butter instead of olive oil for similar flavor development.
Ignoring Salt Timing
Adding all the salt at once can make your soup taste bland after simmering. I add half the salt (½ tsp) with the tomatoes and the rest 5 minutes before serving.
This two-step approach ensures perfect seasoning. Also, remember that low-sodium broth needs more salt—taste as you go! The last thing you want is a boring bowl of soup. 🧂
Boiling Too Vigorous
A rolling boil will break down vegetables and make the soup watery. The key is a gentle simmer—small bubbles at the edges, not a full-on boil. I maintain low heat after the initial boil to preserve texture.
If your pot lacks a lid with a vented steam hole, prop the lid open slightly with a wooden spoon to release steam gradually.
Forgetting the Bay Leaf
This might seem minor, but the bay leaf adds subtle earthy depth that's essential for balanced flavor. I always remember to add it with the tomatoes, then remove it before serving.
If you forget, strain the soup through a fine-mesh sieve to catch the leaf. Never skip this herb—it's the secret to restaurant-quality soup at home. 🍃
Rushing the Resting Time
Serving soup immediately after cooking means missing out on flavor development. I always let mine rest 5-10 minutes off the heat—this allows juices to redistribute and flavors to meld.
The difference is noticeable, especially with potatoes that continue to absorb broth during this time. Patience here transforms good soup into great soup. ⏳
Nutrition facts
Frequently asked questions
Can I make this basic soup recipe vegetarian?
Simply swap the vegetable broth for a high-quality vegetable-based broth and ensure all other ingredients are plant-derived. You can also add white beans or lentils for extra protein. The flavor profile remains rich and satisfying while keeping it completely plant-based.
How do I adjust the recipe for a larger crowd?
Double all ingredients and use a 6-8 quart pot for even cooking. The key is maintaining the same ratios—4 cups broth per 2 servings. For example, 8 cups broth for 4 servings. Simmering time may increase slightly, so check vegetables at 30 minutes instead of 25. A slow cooker on low works perfectly for crowds too!
What can I substitute if I don't have fresh herbs?
Dried herbs work in a pinch! Use ¼ teaspoon dried parsley instead of fresh, and ¼ teaspoon dried thyme is equivalent to 1 teaspoon fresh. For garnish, try toasted breadcrumbs or a sprinkle of grated Parmesan cheese instead. The flavor won't be identical, but it still adds great texture and visual appeal.
Why does my homemade soup taste different from store-bought?
Homemade soup tastes better because you control the ingredients and cooking process! Store-bought versions often contain preservatives, artificial flavors, and pre-cooked vegetables that lack freshness. The sautéing step and simmering time in this recipe develop deep, natural flavors that canned soups can't match. Plus, you can adjust seasoning to your exact taste.
Can I make this soup ahead of time?
This soup actually tastes better the next day! Store it in an airtight container in the fridge for 4-5 days. For freezing, portion into containers and freeze for up to 3 months. When reheating, add a splash of water or broth if it becomes too thick. The flavors meld beautifully overnight for maximum comfort.